Tenebrae Lux Board Puzzles
The candlelit boards on the wharf start from one of several layouts, so a move list only works if it's for your layout. Find yours below and step through it, or set your board up in the solver.
Solve any board
Copy your board: tap a square to cycle spike → stack → flat → empty. An example board is loaded; press Clear to start your own.
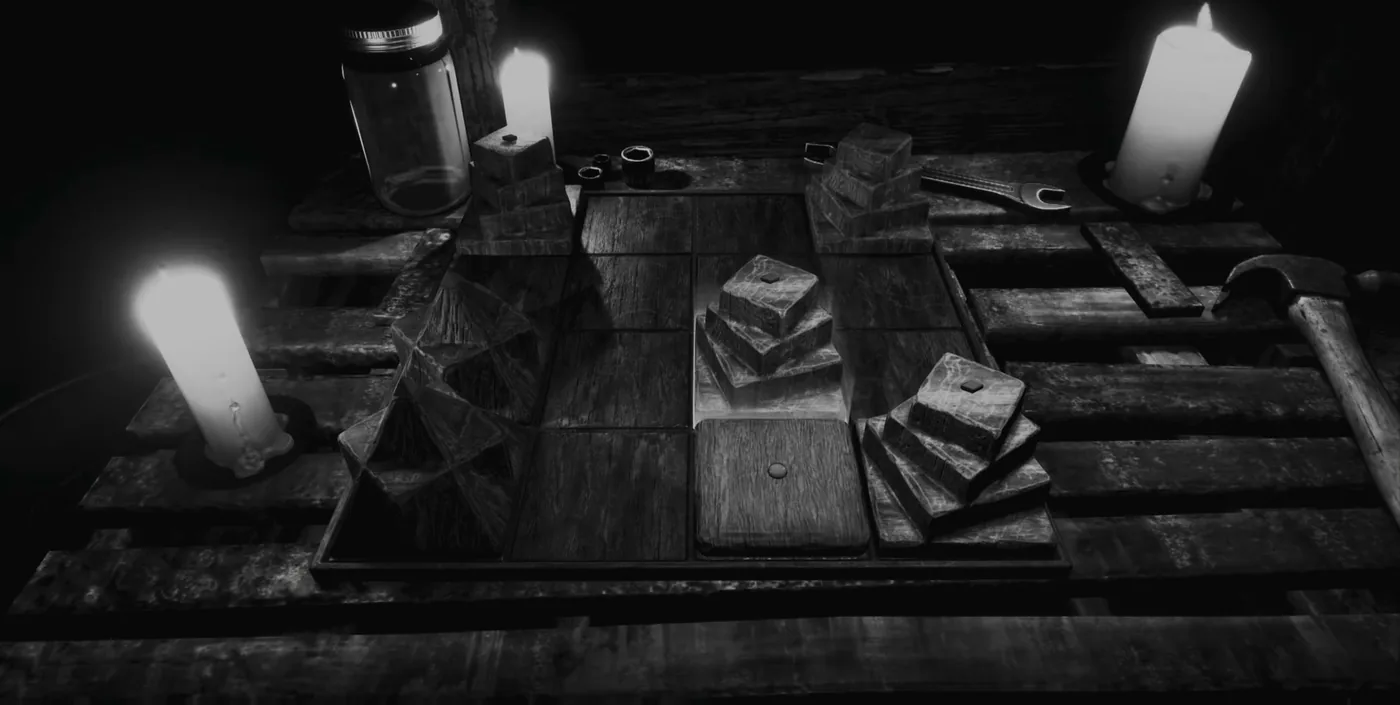
How the pieces behave
Every board is 4 by 4 with three kinds of piece. The goal is an empty board.
- Spikes (pyramids) and stacks (piled blocks) slide in a straight line until the next square is taken or they reach the edge. They stop in front of whatever they hit; they never move into it.
- Flats never move.
- When a piece stops, everything touching it up, down, left or right reacts. A spike removes every flat next to it and survives. A spike next to a stack removes the stack and itself. A stack that stops next to a spike also takes both.
- Spike beside spike, stack beside stack and stack beside flat do nothing, and nothing happens to squares a piece slides past.
So every flat needs a spike to stop next to it, and every spike has to end on a stack. If you run out of moves, leave the board and come back to reset it.
In the diagrams, spikes and stacks are numbered left to right, top to bottom. Press Next move to play the solution one slide at a time.
Board 1: first shack
The first board on the wharf, inside the shack by the water. Four known layouts.
- Spike 1: up, down, right, up
- Spike 1: up, up
- Spike 2: up, up
- Spike 1: down, right
- Stack 2: down
- Spike 2: down
- Spike 1: up, left
- Spike 2: up, up
Board 2: first shack
The second board in the same shack. Four known layouts.
- Spike 1: up, right, down
- Stack 2: up, right
- Spike 1: up
- Spike 1: right, up
- Spike 2: up
- Stack 1: left
- Stack 2: right
- Spike 1: up
- Spike 2: up
- Stack 1: down
- Spike 1: left
- Spike 2: up, up
- Spike 3: left
Board 3: second shack
In the next shack along. Clearing boards 1 to 3 opens the bunker door at the foot of the hill.
- Spike 1: left
- Spike 2: up, up
- Spike 1: up, left
- Spike 1: up
- Spike 2: up, left, down
- Stack 2: down
- Spike 1: left
- Spike 2: left
- Spike 1: down, down, up, left, left
- Stack 1: down
- Spike 1: down, down
Board 4: back porch of the locked shack
Optional. On the back porch of the locked shack up the sloping path; solving it unlocks the shack and the manuscript page inside.
- Spike 1: up
- Spike 2: left
- Stack 3: up
- Spike 1: right
- Spike 2: up
- Stack 2: right
- Spike 1: down
- Stack 4: up
- Spike 2: right
- Spike 1: right, left
- Stack 1: down
- Stack 2: left, down
- Spike 1: up, right, up
- Stack 2: right
- Spike 1: left, down
- Spike 2: left
- Spike 1: down
- Spike 2: left
- Spike 1: left, up
- Spike 2: right, up
- Spike 1: up, up
- Spike 1: down
- Spike 2: left
- Stack 3: down
- Stack 2: right
- Stack 3: up
- Spike 1: right, up
- Spike 2: up, right
Boards not listed here
The board in Cal's mission “Feng Shui” has four towers and two flat pieces: move the bottom-left tower up, the middle tower down and the top-right tower down. Another optional board stands by the cargo container past the pier; solving it opens the container, which holds a page. If your board matches none of the layouts above, set it up in the solver at the top of this page.
A page also lies by one of the boards on the wharf. Pick it up now: the pages matter for the secret ending. Next: the bunker phone code.